Showing posts with label upcycle. Show all posts

Tuesday, February 4, 2014

Winter Star Challenge: Finishing TOuches

The winter star tramp art frame came together nicely with a few bumps along the way.  The old panel I wanted to use for the individual tramp art pieces proved to be too fragile. Wanting to use a strong wood that could be used for tiny pieces, I chose to use Baltic birch plywood.  This proved to be a good choice.

Trying to keep my lines, cuts and chipping as accurate as possible, I still managed to get a set of pieces placed crooked!  And a bottom piece at that!  This is where the strong Baltic birch came in handy:  I had to remove a whole point of the star, separate all of the layers and re cut the very bottom piece.  It was off very slightly but made all of the difference in the balance.


This little detour also proved to be a handy lesson in restoration and I'm sure it will come in handy in the future.  Delicate work takes lots of patience and a gentle touch!

After reworking the removed pieces, I installed a base on the back of the frame to provide strength to the face of the piece. I installed a painted back to the frame with some vintage hardware and antiqued the entire piece.

I'm pretty happy with the finished product.  Silvery blue like a snowflake with a pop of red, very tall and tight (9-12 layers), and the back looks almost as wonderful as the front.

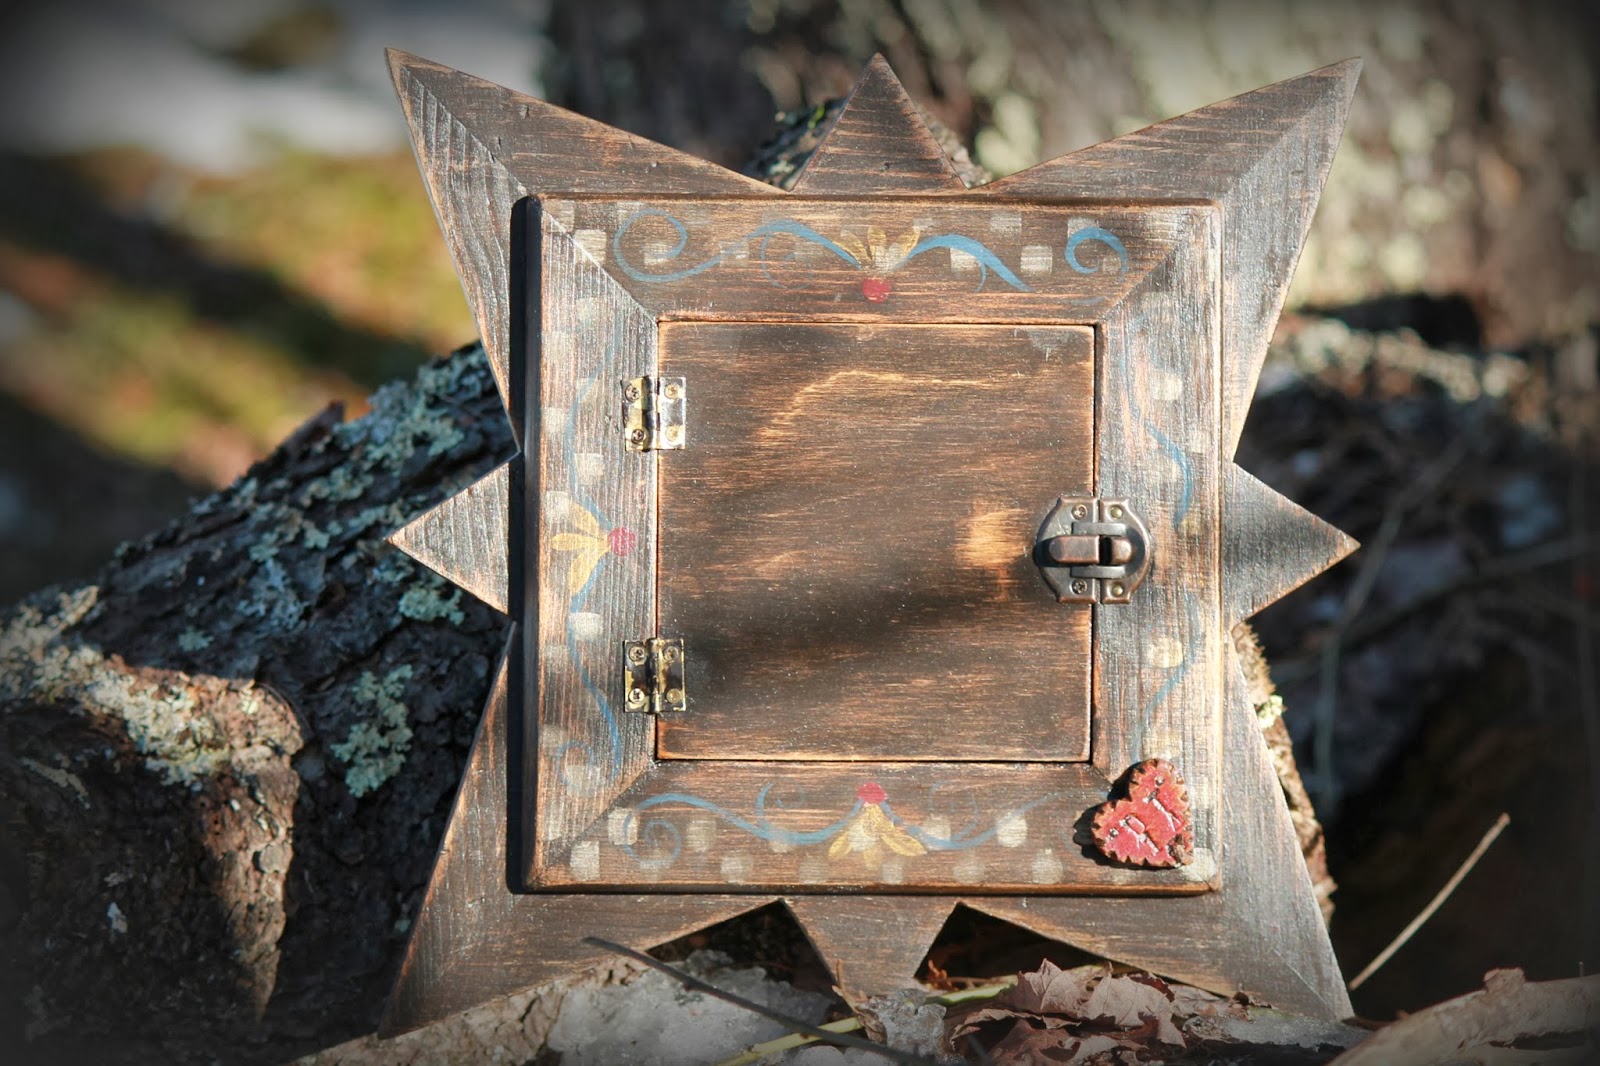


Vintage battered hinges and latch, with hand painted embellishments.


Downeast Tramp Hallmark!

Please let me know what you think of my latest creation.  This piece has been listed on an ebay auction until Sunday.  It's on my wall to enjoy until a great home is found!

Happy Tramping
Angie


Friday, January 24, 2014

Winter Star CHallenge

My next project, Winter Star Tramp Art frame, will be a challenge!  This piece will be an 8 pointed star tramp art frame, that has many thin, precise layers (up to 12), and will be painted in a old bucket blue with maybe metallic gold highlighting.

In order to get the piece I am striving for, there are several attributes I'm trying to include in this piece.

I am hoping to use only up-cycled materials to create this piece.  I have found a old picture frame backing that I think will serve this purpose well.  Lots of nail holes and wear!  I'm just hoping that it doesn't prove to be too fragile to use.  We'll see once I start cutting out the pattern pieces.  This panel is also very thin and I think it will help give me the depth and the large number of layers (up to 13) that I need.

For this piece, I am also paying closer attention to accuracy and placement of layers.  I'm hoping to build the layers in smaller increments and more accurately to get that tight and symmetric look that I am going for.  I've tried to be more accurate in the making of my pattern pieces and hope for precisely cut tramp art pieces.  We'll see about that!

I've designed and cut my base frame into the star shape that I want and have cut out the corresponding pattern pieces for each layer.


Once the pieces are transferred to the wood panel and cut out,  Each piece will be notched using a smaller chipping knife to give more compact pieces and taller design.
 
I'm looking forward to many episodes of Dexter and Antique Roadshow as I chip away at the 90 or so wood pieces.  I refuse to go out in these frigid temperatures if I don't have to.  HIBERNATION IS SETTING IN!
 
Happy Tramping
 
Angie


Sunday, January 19, 2014

Owl Love Tramp Art Frame is COmplete!

Since I have a hard time blogging mid project, I have some catching up to do!

Let see.  Where did I leave off?

After painting and chipping the pieces, I did a quick dry run to make sure all of the colors where working together and that I liked them. I've started painting before I chip.  I think that painting them first then chipping gives the pieces more definition. More of a color variance between pieces.


Yep!  Looks good.  Can't wait to see how they look antiqued! The pieces were then chipped and individually sanded.This step is the roughest on my hands.  I've learned to protect them with gloves and such but they still tend to get sore and a little stiff.  Probably due to those wood chipping marathons I have which usually include many episodes of Downton Abbey.  Highly recommend the show! 

The frame was assembled and a few pieces were tweaked here and there.  A couple of new elements were added and it was ready for antiquing.  I had read about a different antiquing technique and tried it on this piece and have to say that I am quite happy with the results.  With lots of love (buffing and rubbing) the colors are all amazingly rich and warm.  I Love Him!!!!  I am finally getting the warm and rich pieces that I have been looking for.  This frame is my favorite creation so far!


Well...I will be able to enjoy him for the next week or so until he finds his new home.

I can't wait to start my next project!  I've got some great pieces looking for their new purpose.  Will it be the round antique table top made into a round tramp art frame?  Gotta call my glass cutter on that one!

Happy Tramping,

Angie

Friday, January 10, 2014

Owl Love Tramp Art FRame

I have survived the holidays, several snow storms, an ice storm, and the kids being home on vacation!  These busy times don't really leave any spare to work on my creative projects.  I tend to create a design, start the project and slowly pick at it when life allows.  This creative time is so important to me.  Not only do I love to create these pieces of art, I have also learned that I need my creative time.  I'm a much easier person to live with when I'm getting my dose of creative stuff.

I have started my next frame which I am calling Owl Love.  I am making this Owl love tramp art frame for a friend whom is also an owl lover and has supported my creative development over the last year tremendously.  This one is for you Marguerite!

I have sketched up a simple design on paper and have cut out the pine base frame which will be backed with a simple  4 x 4 frame.  After tweaking the design slightly to include a heart,  I created the pattern pieces for each individual piece. Every owl needs a heart, Right?


For this frame, I decided to only use the wood and supplies I had on hand.  After considering many different pieces of repurposed wood pieces, I decided on a combination of  an old panel, poplar, and birch plywood.  Harder wood in the places that needed the support and that were at risk of being broken.  Here is a picture of my dry run of all wood pieces.


Now, off to start the sanding, painting and wood chipping, while thinking about all of the yummy color options for Mr. Owl.  I'm seeing burnt orange, browns and of course blue highlights!  Maybe some metallic gold.....checkerboard pattern?

Happy Tramping 

Angie

Thursday, November 28, 2013

Tramp Art with a side of TUrkey!

Since I am currently creating my tramp art on my kitchen table, finishing the assembly of  the key to my heart II frame was of the up most importance for Thanksgiving day.  Loose pieces needed to be secured and finished, so that we could clear and prepare for our families Thanksgiving. 

A dry run of the assembly brought some uneven pieces to my attention and helped me make some final color choices.  I chose to use a bright turquoise which will look lovely after it is antiqued and will allow for the skeleton keys to show up better.  A little splash of yellow here and there with some hand painted detail to tie it all together.  Here is a picture of the dry run with keys placed on top.


After some quick tweaking, cutting and rechipping the tramp art pieces are secured in there places.  Again predrilling the pieces made the assembly incredibly smooth without broken pieces to recreate and an overall more solid piece.
 
 
Now the step that really changes the looks of things.  The antiquing medium will be added with a little more destruction here and there and VIOLA!!  deep, rich, and time worn colors.  Just the way I like them!
 
Sitting by my side as always, is my best bud Cooper.  Here is a recent picture of him sporting my reading glasses.  He is not very happy about the glasses and is counting the days until school vacation is over.  Too much attention from my thirteen year old when he is used to it just being him and I. He is a gentle soul and completely devoted to me! God love him.
 
 
Happy Tramping with a side of Turkey!     Angie


Sunday, November 17, 2013

Key to my HEart II

My next challenge is creating a tramp art frame like my first Key to my Heart frame but better!  Here is a picture of my original.

 
I am hoping to recreate this piece, while making the frame stronger, the colors lighter and richer, and this new piece will definitely be one of a kind.  Fortunately, I am able to use the pattern pieces from the original with some tweaking.
 
I've gathered pattern pieces, pine frame base, some old skeleton keys, some poplar and oak hobby boards and a quick sketch on paper.  Everything to get started on this special piece minus paint, glue and nails.


After a little bit of reworking and straightening of some pattern pieces, I have traced them onto the hobby boards to cut out.  Oak was used for the very bottom layer to strengthen the entire frame.  The pieces have been cut out and laid out on the base frame for a dry run.  A total of approximately 60 pieces and they are all there and fitting perfectly.


Now for a quick sanding and then the wood chipping will begin.   I'm looking forward to a rainy Monday of wood chipping and catching up on those t.v. shows.  Now to ponder those wonderful colors....teal, red, and ivory! Oh My!
 
Happy Tramping    Angie
 

Wednesday, November 13, 2013

Another thing that I love about what I do! Treasure HUnting!

I just wanted to show off some of the treasures that I have found recently. In time,  Each piece will eventually end up in one of my Tramp Art creations.  I frequent our local Goodwill store, local junk dealers (love these guys), and the occasional thrift store, looking for those sturdy flat faced frames, old wooden boxes, spindles and everything in between. The older, the rustier, the more worn the better!

Here's a pict of the assorted frames that I have found recently. It's much easier for me to buy the base frame than to make it myself.  It's not very easy getting those miter cuts exact and have everything fit correctly!  Still working on these skills! The square frames tend to end up in a star shaped tramp art frames. 

 
They have to be flat faced, made out of wood, and sturdy.  Glass is a plus but not necessary - I have great glass cutter when necessary.  I like the not so ordinary sizes, shapes and colors.  They must be sturdy!
 
 
Not sure how these will work their way into one of my pieces but I could not pass them up.  Old metal with patina, old paint and who of course doesn't need a giant wooden key?  It's not signed any where but does say Deer Isle Maine on it.  A great piece of folk art!
 
 
Bunches of mosaic tiles in very nautical shades of blue, grey and black.  I am thinking something very nautical, with a boat, water.....time will tell.
 
 
Couldn't pass up this amazing piece of white birch bark!  The colors, cracks and knots are just gorgeous!  This is definitely going to end up in one of my pieces after I figure out how to work with it.  A Maine-ish frame with maybe pinecones, thin branches, Native barks.....or maybe an Adirondack inspired piece.
 
I am so thankful for this part of the creation process.  It's so much fun while looking and so satisfying to see these treasures find their homes in my pieces!! 
 
 
Happy Tramping     Angie

Sunday, November 10, 2013

Mission ACcomplished

The sunflower tramp art frame came together nicely;  soft and yummy colors, solid and sturdy, and beautiful all in one.  Thank you Marguerite for your great artistic adjectives!  I have implemented several changes in my creation process and have come away quite satisfied with the results and have saved myself some time and increased the quality of this piece.


Having predrilled some of the smaller pieces of the tramp art layers, the number of pieces having to be recut, rechipped and repainted during the assembly was reduced greatly.  The predrilling will also help create a tighter bond between layers and cut down on future potential piece damage. 

I also religiously kept all pieces in sealed ziplocks so that my cat could not steal them.  No missing pieces!  Assembly was quicker than usually by keeping the pieces organized by color also.

I sometimes can't make the really tiny pieces that I would like to include on my frames.  The wood pieces gets fragile, hard to secure and hard on my hands when they are too tiny.  I don't know why I haven't done it before, but I did some hand painted detail and line work on this piece to bring it all together.  Before I started creating tramp art layers on my frames, most of my frames had hand painted designs and motifs on them.  So I'm not really surprised that the hand painted details are sneaking back in there.

The sunflower crown was created by carving two layers of petals with a vintage brass knob as the center. 


After the pieces was assembled and had had enough drying time, I coated the piece with a coat of antiquing medium.  I always look to deepen my colors and add that touch of time wear to the sanded edges and nooks and crannies.  I then gave certain areas a second coat to darken the edges and notches.  Three coats of polycrit later and we have the finished piece.

I am really excited to have been able to fine tune some of my steps and also save myself some unnecessary steps.  169 wood chipped pieces later, I'm quite happy to be able to send this piece to the Big Apple to fellow tramp art lover, Marguerite.

Happy Tramping,     Angie

Monday, November 4, 2013

With the help of Dexter, the woodchipping is DOne.

After a couple of spurts of wood chipping and several episodes of the series Dexter, the chipping of the tramp art pieces are done.  I think the tentative count is 171 pieces ... but the final count will tell the tale.  I've taken the time to implements a couple of new steps to save on the old hands and cut down on blisters and sore fingers.  Maybe its getting comfortable with my craft or maybe its just getting more serious about what I do, but I discovered that taking this little bit of extra time to protect my hands, improve my lighting and paying more attention to my materials (wood, nails, paint, etc.) always results in a better, stronger, and more beautiful tramp art piece.

Some things I have learned recently creating Tramp Art:

The best time to protect your hands from the sore fingers and blisters that sometimes develop after completing the wood chipping, is to wear very thin work gloves from the start of a project.  The key for me is to never even let the soreness have a chance to happen.

Always using fresh, appropriate grit sand paper can make a project go so much faster and saves on your arms.  Don't forget what a sander is for and use it.  I have also found that a very tiny spring clamp that holds the small pieces, can create an handle that provides a more stable wood chipping surface and soreness.

My best time to do the wood chipping is in natural light during the day.  I can wood chip at night with my super sonic lamp but it is definitely easier on my eyes during the day.  My preference.

It has become necessary to keep more detailed project completion folders that detail the material used, colors used, and keep all of the pattern pieces together.  If ever there is a case of one of my pieces getting damaged, I can pull the project folder and have all of the creation details at my finger tips.  A real time saver.

I have also started to predrill holes into the final layers of tramp art.  I'm hoping this will help me with breakage and the need to create extra tiny pieces to replace them.

Back to the Sunflower Tramp Art Frame!!  Here is a picture of the after wood chipping dry run.  I've had to go back and tweak a couple of pieces but it looks like time for paint.


Lets see ... lots of green, red and yellow.  And maybe I should use this old brass knob!  We will see what happens.

Happy TRamping,      Angie


Thursday, October 17, 2013

LEt the Wood chipping begin!!!

My Sunflower Tramp Art Frame is well under way and taking shape.  I have completed the design of the pattern pieces and have fitted them to the frame.  Each side is a mirror image of its opposite, so I only design the pattern pieces for one side, but make two sets of each for each layer of tramp art.  The top sunflower design and the curved bottom do not repeat on the frame, so they are made with unique pattern pieces.  Here's a picture of the frame with the pattern pieces in their places.


The pattern pieces are then traced and cut out of poplar with my scroll saw. Initial piece count = 171!  Thanks to Delaney for doing Mom a favor and counting every little piece.  Now to get them all chipped and the sunflower carved.  Netflix, Amazon Prime, recliner and iced tea here I come!!


Happy Tramping!   Angie


Wednesday, October 2, 2013

Shifting Gears Slowly

It sure doesn't feel like October 2nd here in Maine.  High 70s and not a cloud in the sky. The annual gear shifting from the busy summer season to the creative being at home season seems to become harder and harder for me as each year goes by.  Starting up those creative juices is not easy for me and I tend to have a few weeks of cleaning out, pondering and finishing up my summer projects before I can put the hammer to the nail.

The work space is some what cleaned up thus available to start the next tramp art creations.  Tools and wood organized, my flea market treasures are bought and kids are back in school.

Here are some of the salvaged treasures that I found over my travels this past summer.  Lots of old wood, dominoes, vintage blocks, etc.  I'm looking forward to creating some amazing frames over this winter and sharing them on Downeast Tramp and Whimsey.


To warm up before I delve into some of the more intricate frames, I decided to add some color to this frame that I was giving to a family member as a gift.  A little color here, a little color there, some tramp art pieces here, and this vintage looking frame was created.  The colors came out very rich and really make the wood carving pop.  But of course the frame does not even compare to the handsome guy in the frame.  He's my special little Pickle!


Now, back to those 4 to 5 frames that I need to make......

Tuesday, June 11, 2013

My Tramp Art FRenzy

The conditions were perfect.  Rainy weekend, busy kids and a husband on a fishing trip.  And of course streaming movies!  And not to mention the 6 hour manhunt on my road resulting in closed roads and locked doors - Yes, in my little town where this stuff is unheard of.  I fully took advantage of the situation and I notched, painted and sanded my way to complete the Star Spangled Frame.

Here is a picture of the base frame and notched layers before assembly.
 
 
This frame measures 15 1/2 x 13 1/2 and holds a standard 8 x 10 picture.  It has gold star corners and has been embellished with brass decorative tacks.


This piece had some designing challenges for me but I am happy to say everything turned out great. It has balance, rich colors and is an original.  It will soon be off to its new home and I will be on to my next tramp art challenge.
 
 
Happy Tramping!   Angie


Thursday, June 6, 2013

Let the Wood Chipping BEgin


The star spangled pine frame is done.  All 90 something wood pieces and layers are designed and cut.  


A few adjustments here and a little more sanding there, and they are ready for the next step.  The fun part is about to begin:  wood chipping.  A wet weekend on the way, hopefully new movies on Netflix, and recently sharpened knives, and I’m ready for a wood chipping fest!  It takes away the guilt of actually sitting down in front of the television and catching up on that watch list.  And they wonder why I enjoy this sooo much….

Happy Upcycling     Angie


Tuesday, June 4, 2013

Star Spangled Tramp Art FRame


My latest piece: Star Spangled Tramp Art Frame, is well underway.  This piece is a custom order for one of my amazing collectors in New York City.  You know who you are!! 

This piece is inspired by a tramp art frame that was built in the early 20th century and is still to this day ablaze with the old red, white and blue.  Seeing where the 4th of July is fast approaching, I had to start my to do list with this frame. 

I have completed the pine base to accommodate a 8 x 10 piece of glass and will be flanked in each corner with gold stars.  This tends to probably be the trickiest part of the frames for me.  Wow! Is it hard to get a straight 45 degree miter cut.  Mine are getting better and have been helped tremendously by getting to know my miter saw, but they still need work.


The pine base was then cut to provide for a strong foundation for the stars and the tramp art on the sides.  I’ve started designing the sides and all of the individual pattern pieces and will be tracing them on sheets of wood to be cut and then chipped.

Now, what color combination will I use?? Red, white, blue, white, red?  No, blue, white, red, white, blue?  Stay tuned….


Happy Upcycling     Angie


Thursday, May 30, 2013

My Tramp Art EVolution

After a couple of inquiries, I just wanted to show a brief glimpse at how my tramp art creations and style have evolved over the years.  It was really fun to dig up some old pictures of earlier pieces.  It’s amazing how a few years of experience and growth can transform things.
 
My wood working started with trying to create a basic frame that would complement my fraktur paintings I was creating.  With no directions, a miter saw and a determination to  create something that that had that rustic feel,  I started creating very basic primitive frames.

Here are two early examples of my frakturs in frames.  The yellow tramp art frame was my first attempt at tramp art.  Not bad!


After getting more confidence and more comfortable with wood chipping knives, I experimented with different shapes, colors and types of wood.    I discovered decorative tacks and nails, and enjoyed sharing my creations with many collectors far and near.  I was honored to be featured in the book “Tramp Art: Another Notch, Folk Art from the Heart” by Clifford Wallach and am proud to say he is the owner of two of my pieces.


Just recently, I have started to solely concentrate on the design and creation of the frames.  I have found that this has allowed me to fine tune the designs and spend more time on material and embellishment selection.  I can see how this change has changed my end product more than anything.  More variety in design and color, better quality completed pieces, and a much more relaxed end product. 


 I have created other pieces outside of picture frames, but continue to call picture frames some of my favorite and best creations.  My pieces continue to change and evolve, becoming bolder and more complicated.


It continues to be exciting for me to find that amazing chippy spindle, rusty spigot and that next amazing design.  
 Happy Upcycling!      Angie


Monday, May 27, 2013

Pepsi Crate Tramp Art APothecary

So excited to share my latest creation with you all.  This piece is not one of my usual creations but incorporates tramp art and upcycling to create a very functional piece.  I started out with a vintage pepsi crate and a dozen wooden match stick holders.  After removing 2 dividers, I had the perfect bones for an apothecary.


With a few cuts with the miter saw, I had twelve sound drawers on which to build my tramp art.  I decided on hearts in the center with home made drawer pulls.  Antique shades of red and blue jumped out at me.  After experimenting with several shades of stain, I believe with the help of my husband, we found the perfect shade that blends with the old wood of the crate.  I dug out some vintage yard sticks that I purchased and used them on the face of each drawer.  Their vintage colors and advertising is amazing.  Sanding, notching and more sanding....Viola!  A Pepsi Crate Tramp Art Apothecary with 12 functional drawers painted in rich antique blue and red.


I am very happy with the end result and the amazingly rich colors.  Let me know what you think!!
 
Happy Upcycling    Angie
 

Thursday, May 16, 2013

Old but Good BOnes!

I have two amazing vintage wooden Pepsi crates that have lived in my basement for probably 5 years or more.  Had to have them.  They have old but good bones.  You know...worn and smells old, great patina, worn paint, and rusty but not bug or water damaged in anyway.  They have been waiting for that upcycle idea to pop in my head too long.

Well today is the vintage wooden Pepsi crates day for upcycling.  After removing a couple of the dividers, coming across a lot of wooden match boxes, I have found their destination.  I haven't put the design on paper yet, but have a Tramp Art crate apothecary forming in my head.   I believe with a few alterations, the 25 or something match boxes will become the drawers.  The faces of the drawers will have to be tramp art of course with maybe some chippy paint vintage knobs.  Or maybe a carved bird.....time will tell where these old bones will take me.

 
Happy Upcycling   Angie

Thursday, May 9, 2013

Creation of the Turquoise Star Tramp Art FRame

I started this star tramp art frame with a simple .99 cent sturdy frame from Goodwill and the desire to create a simple, not complicated tramp art piece.  I tend to stray from the Keep it simple philosophy and usually end up with a project much larger than intended.  I truly believe that I stayed with in the simplistic guidelines this time and created a intriguing piece.
 
I created the design and the basic template pieces.  I find the more time I spend on this step, the better the frames come out; the pieces fit together better and I spend less time correcting measurements.


After cutting, sanding and notching, I put the pieces together for a dry run.  It never fails, I always lose pieces in my travel.  Outside to sand and notch. Inside to paint.  I also think my cat hides them on me.  I'm learning the value of bins and ziplock baggies fast.


After painting, distressing and putting together, here is the final turquoise star tramp art frame.  It was embellished on the inside of the frame with decorative brass tacks.


I am quite happy with the finished product but more happy that I was able to keep it simple stupid.  Sometimes, less is more!
 
Happy Upcycling     Angie


Monday, May 6, 2013

Tramp Art Heart Frame COmpleted

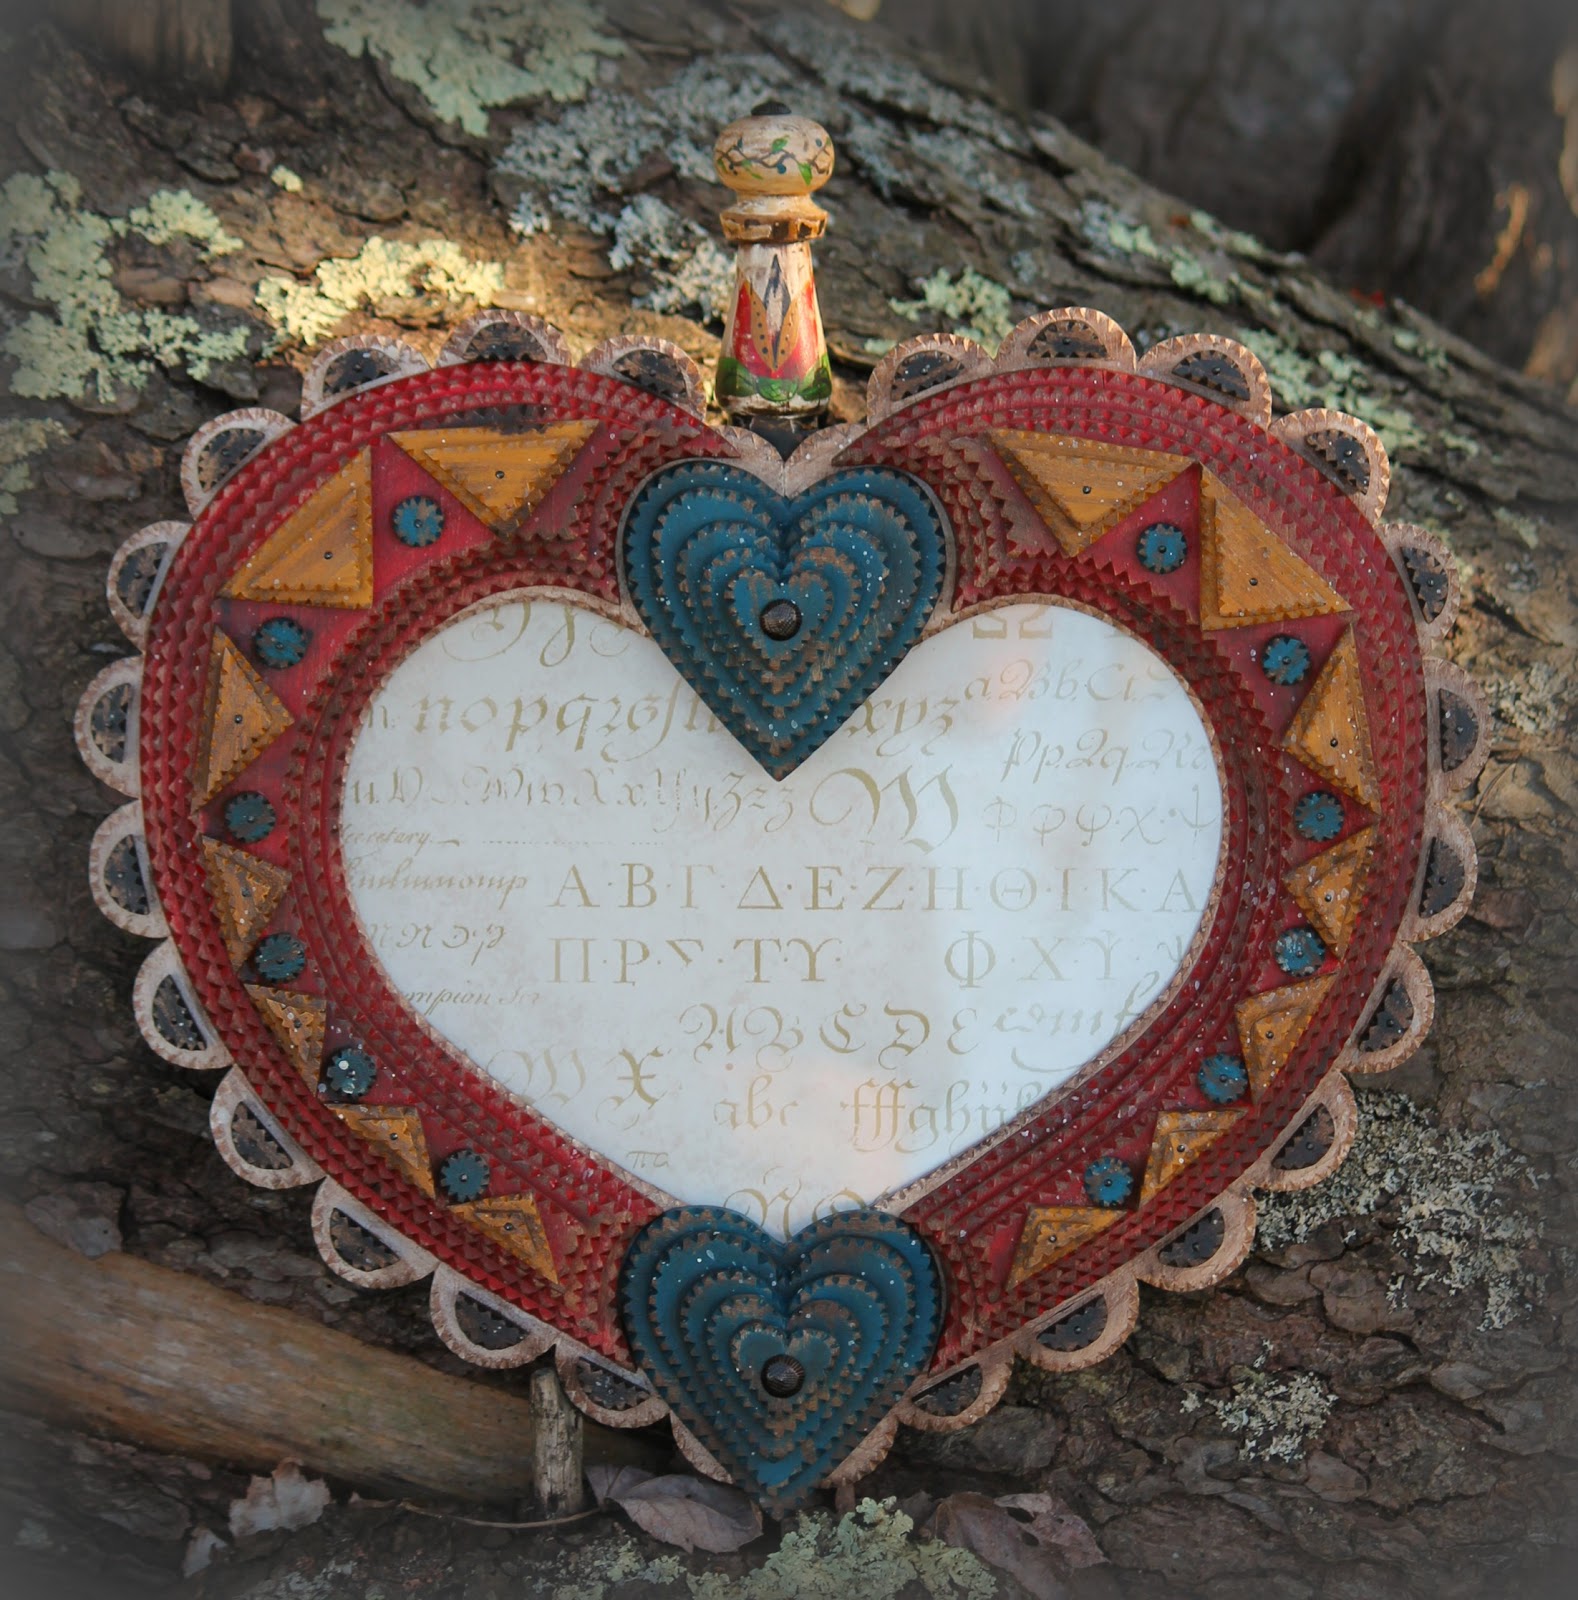
After many hours of chipping, painting and sanding, the tramp art heart frame is complete.  It consists of approximately 75 wood chipped pieces, an hand crafted finial, and decorative tacks.  The frame measures 14 x 14 and can accommodate a picture in the 9 x 6 heart opening.

I created a lacy looking border for this frame and embedded two blue hearts that were finished off with black decorative tacks.  It turned out amazing and looks very close to my original design.  The finial was not part of the original design and was created using a vintage knob and spindle.


Now to find a good home for this frame.  Maybe a wedding gift, in a primitive home displaying a vintage photo.....
 
Happy Upcycling     Angie