Showing posts with label star. Show all posts

Monday, July 7, 2014

Sea Breeze Tramp Art Frame: Completed!

Now that school is finally out and the school activities have stopped, our house is starting to get into a new routine and schedule.  Between the summer jobs, sport camps and friend time,  we are still busy but without the homework load and early wake up times.  I have managed to work in bursts of tramp art time and have completed the Sea Breeze Tramp Art Frame.


Let me back track a little.  After chip carving the 108 wood pieces, I did a quick dry run to check on their fit. 


Looks great! They are ready to paint.  Another advantage of this sunny weather, is that the paint drying time is much shorter.  Everything got the coats of paint they required and  were placed out in the summer sun for a quick dry session.


Now a quick assembly to check on my color combination.


Like magic! After lots of sanding, assembly, antiquing, and varnish, my Sea Breeze tramp art frame was complete.  Gold gilding was added for the pop and the back side was finished with a decorative boarder design. I love this sea breeze / orange combination! Very eye catching to say the least.


Happy Tramping,
Angie

Saturday, June 28, 2014

Sea Breeze Starburst Tramp Art Frame

I've started my next project, "Sea Breeze", and its moving right along.  I've created a preliminary design, created the layout and have decided on a palette.  What is not to love about sea breeze green and burnt orange, antiqued and buffed into amazing, rich shades?  Hands down one of my favorite color combinations!


I've created all of the pattern pieces, scroll cut the  pieces and have started the chip carving.  For strength this piece is getting a base layer of oak, and will be completed in hand chipped poplar.  I've built a strong pine base frame to build upon and created a dust cover for the back.  


Off to enjoy my Maine sea breeze and a glass of cold iced tea, while I work on my basket of chip carving!  Does life get any better???

Happy Tramping,
Angie

Tuesday, June 24, 2014

Stars and Stripes Tramp Art Frame: Completion

This frame turned out amazing!  Very rich colors, deep tramp art layers, accurate cuts and a fine tuned tramp art frame .  I am very happy with the completed piece and it's patriotic feel.

Now where did I leave off with the blogging? 

After creating the square pine frame base and shaping the corners to the star shape that I needed, I created each individual pattern piece for each layer.  Each piece was transferred to the wood, cut out, sanded and chipped carved.  All 168 pieces!  I had sore fingers after this one.


Before chip carving. Kind of daunting!


Here is a picture of  the fitting I did after notching them.  There were only a couple of pieces that I needed to recreate and tweak.


9 piece star stack


The pieces were then sorted into ziplock bags according to the colors that they were to be painted. 


Lots of painting and sanding ensued, and it's final assembly got underway.  The pieces fit together very nicely and accurately, and resulted in a fine tuned tramp art frame.  But it was lacking something...it needed a pop.  I created an hand carved star for each side and applied gold leaf to each.  That was the pop it needed!


The mirror is ordered, varnish applied and the backing created. So happy with the end results!

Happy Tramping,
Angie


Wednesday, June 4, 2014

Stars and Stripes Tramp Art Frame: Design

Amazing what a few sunny days can do for a soul!!  Salsa garden is planted, lawn is mowed and my next challenge is underway.  Being close to the 4th of July, I'm feeling a little patriotic and have started my Stars and Stripes Tramp art frame.

Here is the initial design!


I'm thinking vintage shades of red, white, blue and gold gilding. Lots of deep layers finished with lots of love and just the right amount of antiquing. 

Can she create it?  Stay tuned

Happy Tramping,
Angie 


Tuesday, June 3, 2014

Working on Fine Tuning My Backside!

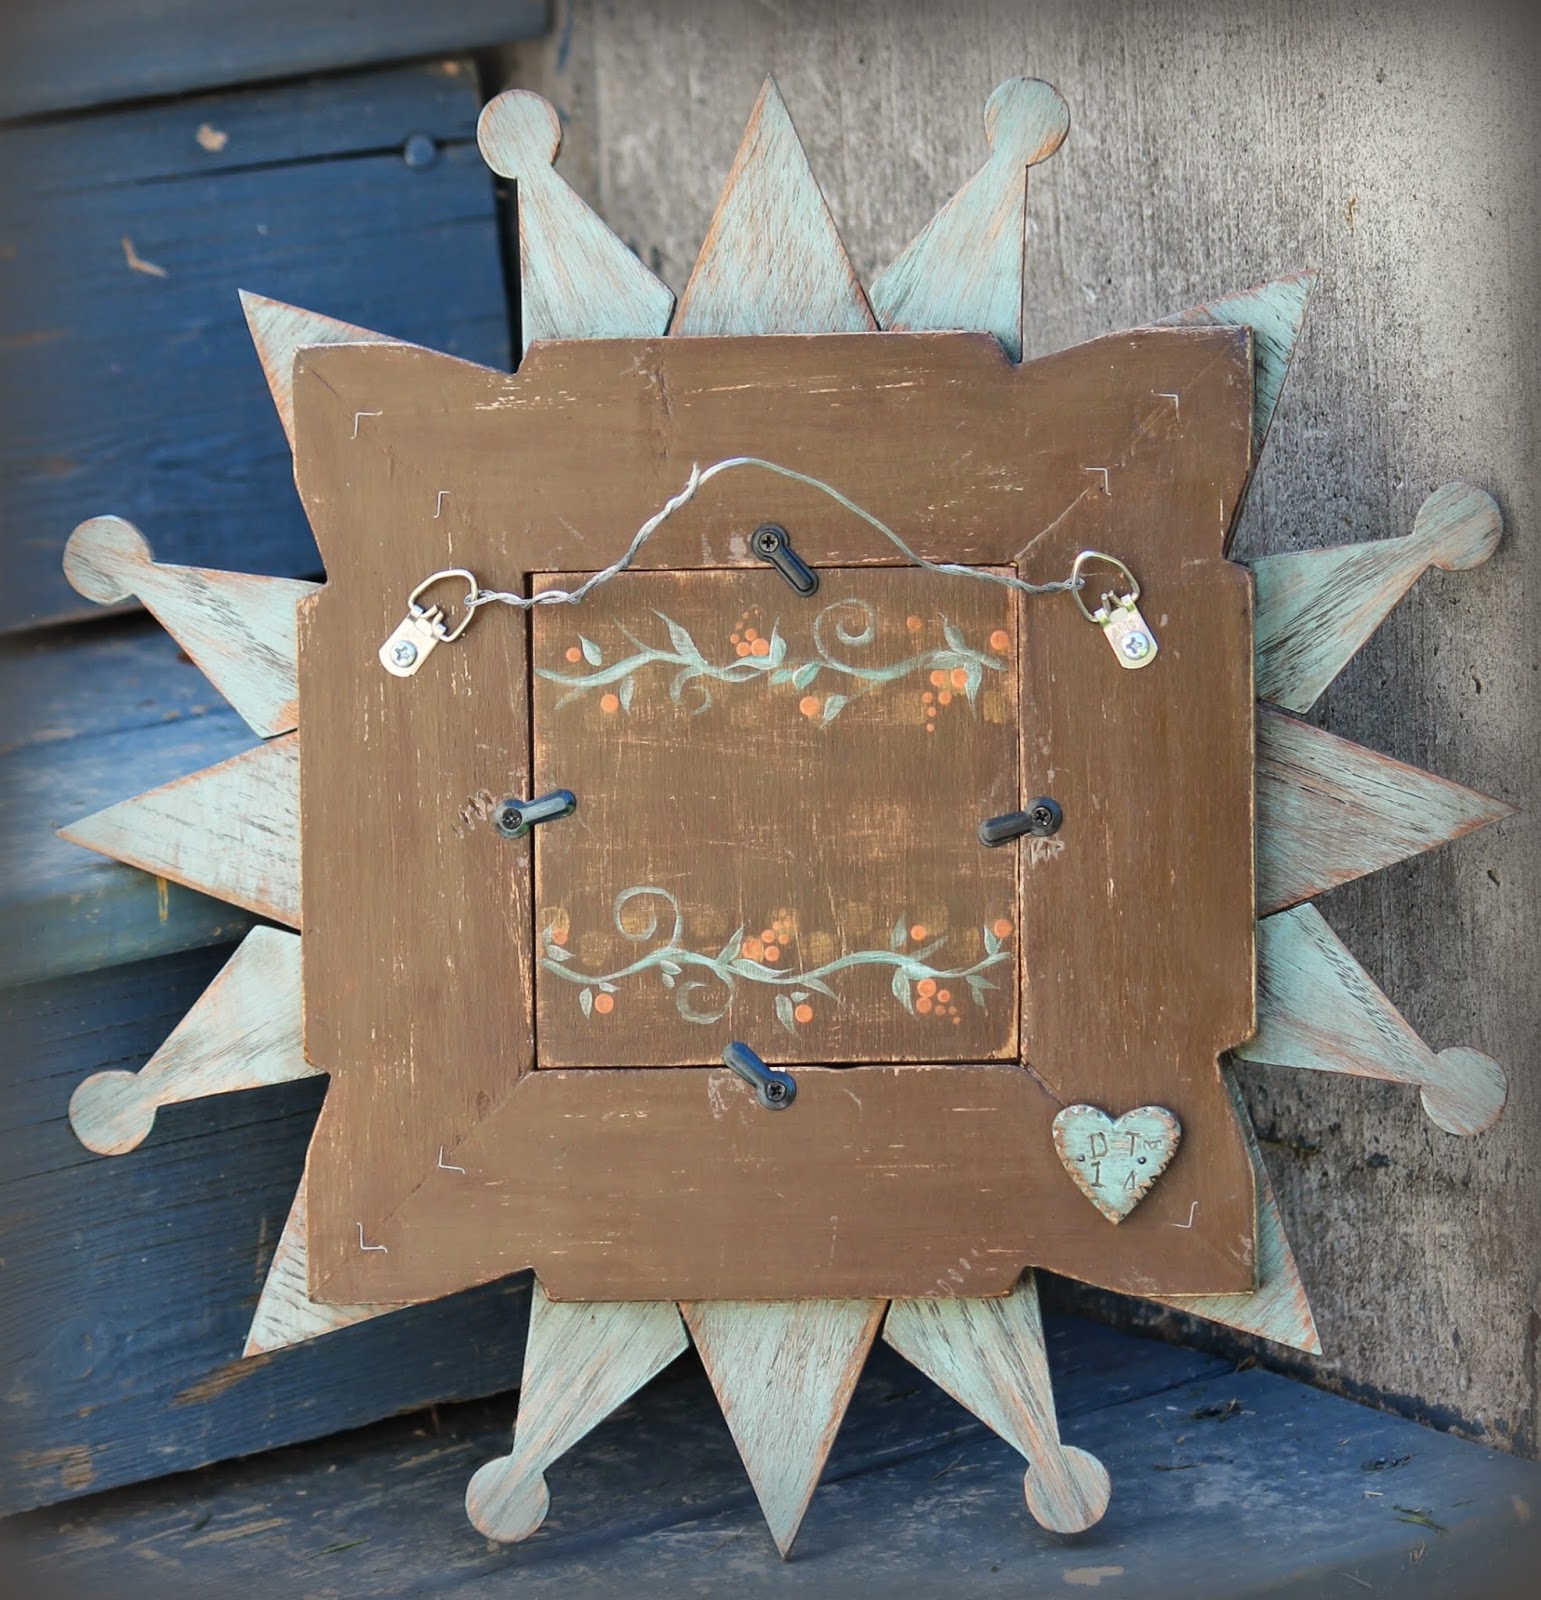
The backside of my frames, of course!  I've been working on getting the backside of my frames as beautiful as the fronts.  They have to be trampy and beautiful but easy to use and sturdy.  It's an on going process but my backsides are evolving in the right direction! 

Here is a picture of the backside of my starburst tramp art frame.  Vintage, warm colors carried onto the back, easy to use turn buttons, and signature in place, while equipping the frame with strong hanging hardware.    And of course, topped off with some hand painted vines and berries!


I have been using the backside of my frames to test new techniques, colors and experiment with new ideas.  The place I really tend to cut loose!  You never know what you will find on the backside of my frames!

Happy Tramping,
Angie


Friday, May 30, 2014

Starburst Tramp Art Frame: Completion!

What is that shiny, bright thing in the sky??  Finally!  Boy have we earned this sunny, warm, and rain free weekend coming up!  With the arrival of this sunny stretch, I am glad to put the finishing touches on my Starburst Tramp Art frame. 

This piece was completed in a soft burnt orange, antique teal highlights and pops of gold gilding.  The colors came out amazing and have been finished with four coats of finish.  After lots of love and care, I am pleased with the end results.  This piece measures 15" x 15" and can hold a mirror or a  4 3/4" x 4 3/4" photo.  This frame consists of approx. 88 hand chipped wood pieces and from 4 to 7 layers of tramp art.


So pleased with the precise cuts and more uniform wood chipping!  The additional time spent on  a more accurate design,  pattern pieces and exact cuts has really paid off in the end product.  They are still a little quirky and "trampy" but that's what makes me love them so much.  A little off here, a little worn there, and definitely one of a kind!
 
Now back to the sketch book to figure out my next piece.  With the 4th of July coming up, I'm leaning towards a patriotic piece.  I'm thinking old glory in tramp art!  We'll see....
 
This piece is available for sale!  Please message me if you are interested in this Downeast Tramp frame.
 
Happy Tramping,
 
Angie

Wednesday, May 28, 2014

Starburst Tramp Art Frame : Assembly

I believe if we all think sunshine, we will get sunshine and boy do we need it! My garden and my tomato plants are waiting patiently.  So in the hopes of some warm sunny weather, I started to create this warm and sunny starburst tramp art frame. 

I have painted each layer a warm soft orange with bursts of ocean mist green.  Orange/teal color schemes always make me happy! This piece will include a pop of gold gilding around the parameter of the frame.  So far the colors look just like the shades I was looking for.  Once these soft colors are antiqued, they quickly become rich and yummy!

Here is a picture of my last dry run before assembly.  I use this step to double check my pieces, my colors, my fit and my nailing logistics.  Got to nail them so that the nails stay covered as much as possible!


This has got to be my favorite part of creating my tramp art frames: assembly.  I continue to be surprised at how interesting, beautiful and original they all come out. This is the stage where I can really see all of my sketches, pieces and work come together.  It is so much fun!
 
Off to predrill some holes and complete the assembly.  I can't wait to antique these colors and see how this starburst is transformed.
 
Happy Tramping,
Angie

Tuesday, May 20, 2014

Bring on the Starburst Tramp Art Frame

I've started to design my next project: Starburst Tramp Art Frame, which has been inspired by the sunshine that we so need after a week of wetness. Enough rain already!  

This pieces will be a starburst of warm, vintage orange with teal and dark chocolate, and should consist on approximately 88 hand chipped tramp art pieces with 3 - 7 layers.  Here is a picture of my sketch, pattern pieces and pine base frame.


I've settled on very warm, vintage orange (my favorite color!) for the points, teal for the knobby pieces and dark chocolate and gold gilding for the details. Here is a closer look at the palette I want to work with. Do you like the combination of vintage orange and teal?


I love this combination of orange and teal, but am thinking that I might go a little lighter on the teal in this piece. We will see......off to cut out the wood layers!

Happy Tramping,
Angie

Tuesday, February 4, 2014

Winter Star Challenge: Finishing TOuches

The winter star tramp art frame came together nicely with a few bumps along the way.  The old panel I wanted to use for the individual tramp art pieces proved to be too fragile. Wanting to use a strong wood that could be used for tiny pieces, I chose to use Baltic birch plywood.  This proved to be a good choice.

Trying to keep my lines, cuts and chipping as accurate as possible, I still managed to get a set of pieces placed crooked!  And a bottom piece at that!  This is where the strong Baltic birch came in handy:  I had to remove a whole point of the star, separate all of the layers and re cut the very bottom piece.  It was off very slightly but made all of the difference in the balance.


This little detour also proved to be a handy lesson in restoration and I'm sure it will come in handy in the future.  Delicate work takes lots of patience and a gentle touch!

After reworking the removed pieces, I installed a base on the back of the frame to provide strength to the face of the piece. I installed a painted back to the frame with some vintage hardware and antiqued the entire piece.

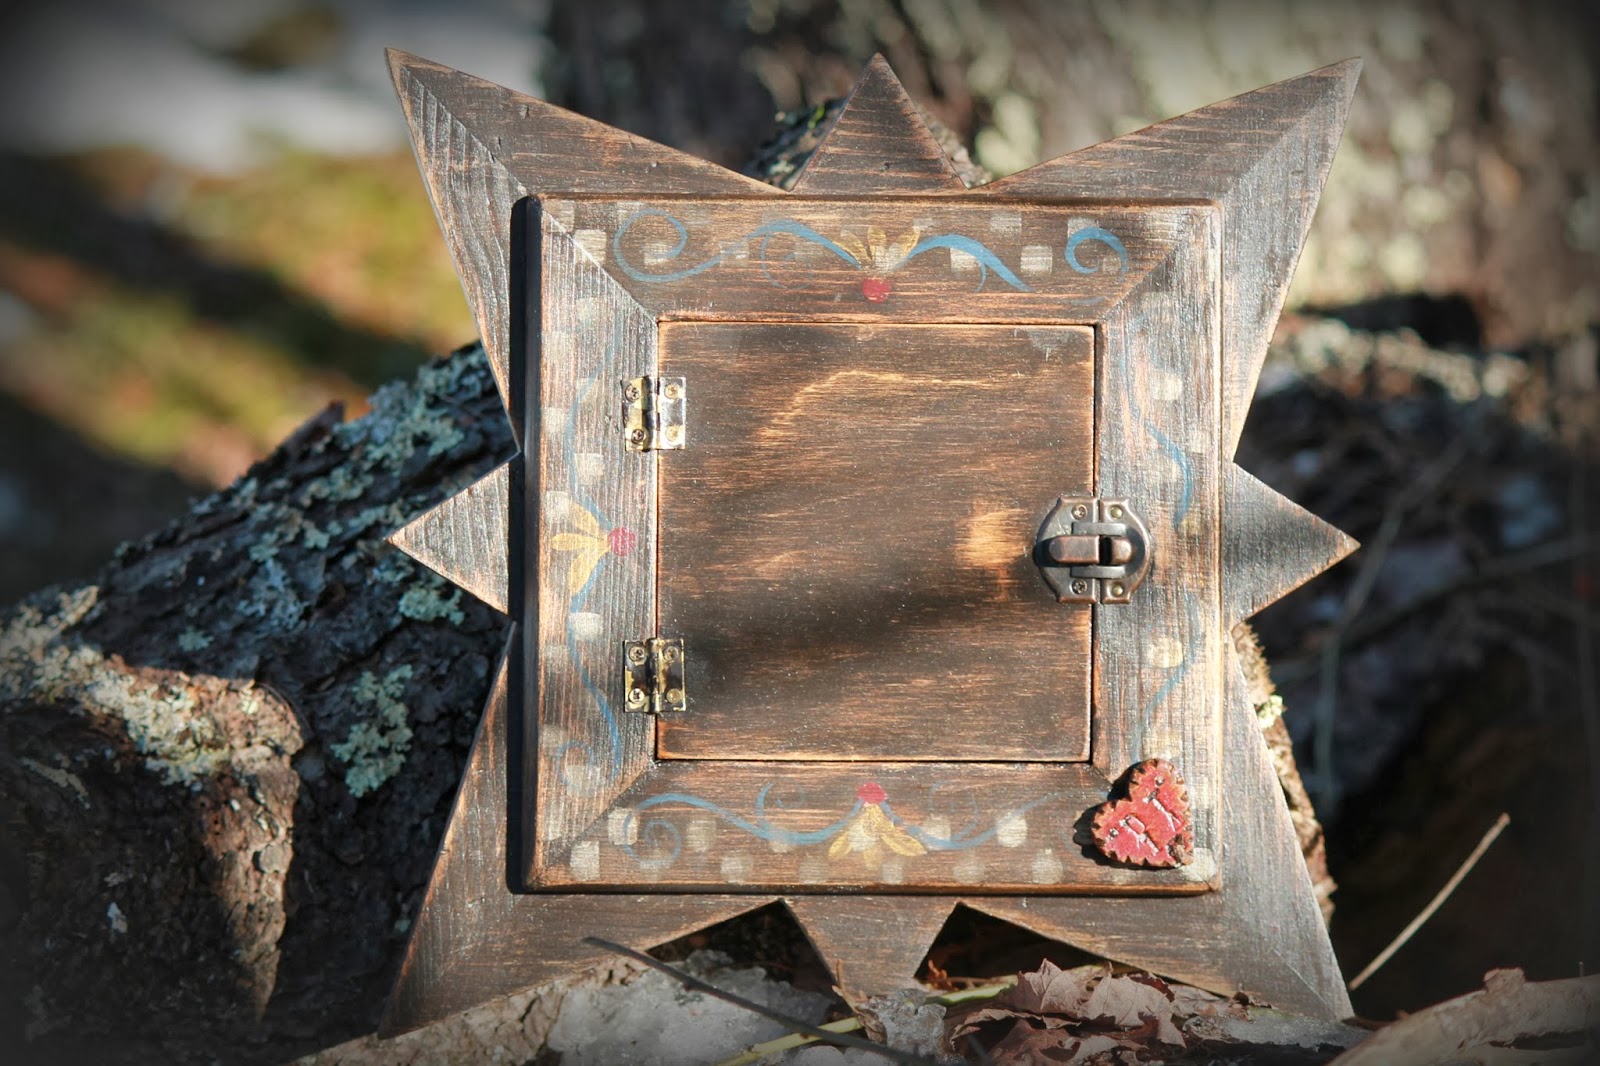
I'm pretty happy with the finished product.  Silvery blue like a snowflake with a pop of red, very tall and tight (9-12 layers), and the back looks almost as wonderful as the front.


Vintage battered hinges and latch, with hand painted embellishments.


Downeast Tramp Hallmark!

Please let me know what you think of my latest creation.  This piece has been listed on an ebay auction until Sunday.  It's on my wall to enjoy until a great home is found!

Happy Tramping
Angie


Friday, January 24, 2014

Winter Star CHallenge

My next project, Winter Star Tramp Art frame, will be a challenge!  This piece will be an 8 pointed star tramp art frame, that has many thin, precise layers (up to 12), and will be painted in a old bucket blue with maybe metallic gold highlighting.

In order to get the piece I am striving for, there are several attributes I'm trying to include in this piece.

I am hoping to use only up-cycled materials to create this piece.  I have found a old picture frame backing that I think will serve this purpose well.  Lots of nail holes and wear!  I'm just hoping that it doesn't prove to be too fragile to use.  We'll see once I start cutting out the pattern pieces.  This panel is also very thin and I think it will help give me the depth and the large number of layers (up to 13) that I need.

For this piece, I am also paying closer attention to accuracy and placement of layers.  I'm hoping to build the layers in smaller increments and more accurately to get that tight and symmetric look that I am going for.  I've tried to be more accurate in the making of my pattern pieces and hope for precisely cut tramp art pieces.  We'll see about that!

I've designed and cut my base frame into the star shape that I want and have cut out the corresponding pattern pieces for each layer.


Once the pieces are transferred to the wood panel and cut out,  Each piece will be notched using a smaller chipping knife to give more compact pieces and taller design.
 
I'm looking forward to many episodes of Dexter and Antique Roadshow as I chip away at the 90 or so wood pieces.  I refuse to go out in these frigid temperatures if I don't have to.  HIBERNATION IS SETTING IN!
 
Happy Tramping
 
Angie


Tuesday, June 11, 2013

My Tramp Art FRenzy

The conditions were perfect.  Rainy weekend, busy kids and a husband on a fishing trip.  And of course streaming movies!  And not to mention the 6 hour manhunt on my road resulting in closed roads and locked doors - Yes, in my little town where this stuff is unheard of.  I fully took advantage of the situation and I notched, painted and sanded my way to complete the Star Spangled Frame.

Here is a picture of the base frame and notched layers before assembly.
 
 
This frame measures 15 1/2 x 13 1/2 and holds a standard 8 x 10 picture.  It has gold star corners and has been embellished with brass decorative tacks.


This piece had some designing challenges for me but I am happy to say everything turned out great. It has balance, rich colors and is an original.  It will soon be off to its new home and I will be on to my next tramp art challenge.
 
 
Happy Tramping!   Angie


Thursday, June 6, 2013

Let the Wood Chipping BEgin


The star spangled pine frame is done.  All 90 something wood pieces and layers are designed and cut.  


A few adjustments here and a little more sanding there, and they are ready for the next step.  The fun part is about to begin:  wood chipping.  A wet weekend on the way, hopefully new movies on Netflix, and recently sharpened knives, and I’m ready for a wood chipping fest!  It takes away the guilt of actually sitting down in front of the television and catching up on that watch list.  And they wonder why I enjoy this sooo much….

Happy Upcycling     Angie


Tuesday, June 4, 2013

Star Spangled Tramp Art FRame


My latest piece: Star Spangled Tramp Art Frame, is well underway.  This piece is a custom order for one of my amazing collectors in New York City.  You know who you are!! 

This piece is inspired by a tramp art frame that was built in the early 20th century and is still to this day ablaze with the old red, white and blue.  Seeing where the 4th of July is fast approaching, I had to start my to do list with this frame. 

I have completed the pine base to accommodate a 8 x 10 piece of glass and will be flanked in each corner with gold stars.  This tends to probably be the trickiest part of the frames for me.  Wow! Is it hard to get a straight 45 degree miter cut.  Mine are getting better and have been helped tremendously by getting to know my miter saw, but they still need work.


The pine base was then cut to provide for a strong foundation for the stars and the tramp art on the sides.  I’ve started designing the sides and all of the individual pattern pieces and will be tracing them on sheets of wood to be cut and then chipped.

Now, what color combination will I use?? Red, white, blue, white, red?  No, blue, white, red, white, blue?  Stay tuned….


Happy Upcycling     Angie


Thursday, May 9, 2013

Creation of the Turquoise Star Tramp Art FRame

I started this star tramp art frame with a simple .99 cent sturdy frame from Goodwill and the desire to create a simple, not complicated tramp art piece.  I tend to stray from the Keep it simple philosophy and usually end up with a project much larger than intended.  I truly believe that I stayed with in the simplistic guidelines this time and created a intriguing piece.
 
I created the design and the basic template pieces.  I find the more time I spend on this step, the better the frames come out; the pieces fit together better and I spend less time correcting measurements.


After cutting, sanding and notching, I put the pieces together for a dry run.  It never fails, I always lose pieces in my travel.  Outside to sand and notch. Inside to paint.  I also think my cat hides them on me.  I'm learning the value of bins and ziplock baggies fast.


After painting, distressing and putting together, here is the final turquoise star tramp art frame.  It was embellished on the inside of the frame with decorative brass tacks.


I am quite happy with the finished product but more happy that I was able to keep it simple stupid.  Sometimes, less is more!
 
Happy Upcycling     Angie